Display Files and Images
Files can be displayed on a page as a thumbnail or as a link. There are a few different ways to Upload Files.
You can control how the file appears on your page. The options available depend on the type of file.
Insert a file into your page
There's a few ways to insert a file into your page:
- Go to Insert > Files on the editor toolbar and select any of the previously uploaded files, or
- Drag the file directly into the editor (this will upload and insert the file in one step), or
- Type ! and choose an attached file from the autocomplete drop down.
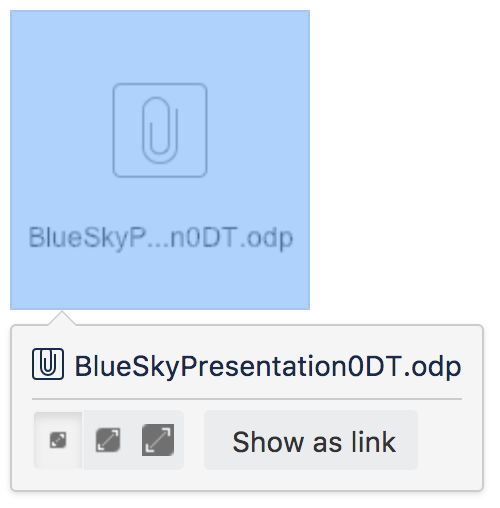
Your file will appear on your page as a thumbnail. Click the thumbnail to resize it or to switch to showing the file as a link.
Insert a file attached to another page
You can display a file that's attached to a different page of the same Confluence site, if you know the name of the file.
To display an image attached to a different page:
- Go to Insert > Files and choose the Search on other pages.
- Enter the name of the file.
- Choose whether to search the current space or All Spaces and choose Search.
- Select the file from the search results and choose Insert.
Insert an image file from the web
You can display an image from a remote web page on your Confluence page, without needing to attach it to your page. You need to know the URL for the image, not for the web page it appears on. This is only available for image files, not other types of files (like documents).
To display an image from a web page:
- While editing the page, position the cursor where you want to place the image.
- Choose Insert > Files and choose Images from the web.
- Enter a URL for the image. (example: http://atlassian.wpengine.netdna-cdn.com/wp-content/uploads/AtlassianBushRegeneration-12January2012-083-trunc.jpg
- Choose Preview to check that the URL and image are correct.
- Choose Insert.
Delete files from your page
If you delete a file or image in the editor, the attached file will not be deleted. Go to
Seeing an 'unknown attachment' placeholder on your page? This means that the attached file has been deleted from the page (or another page).
Preview a file
Click an image, file thumbnail or link when viewing a page to launch the preview.
The preview includes images from the web that are displayed on the page and files that are attached to the page (even if they are not currently displayed on the page).
In the preview you can:
- download the image file
- upload a new version of the file (attached files only)
- comment on the file
- choose to edit the file with a desktop application
- zoom in, out or fit the image to the width of your browser
- browse like a slideshow using the next and back buttons
- see other files attached to the page and select a thumbnail to preview that file
- switch to a full screen presentation mode
Several file types can be previewed, including Office files, PDFs and many image types.
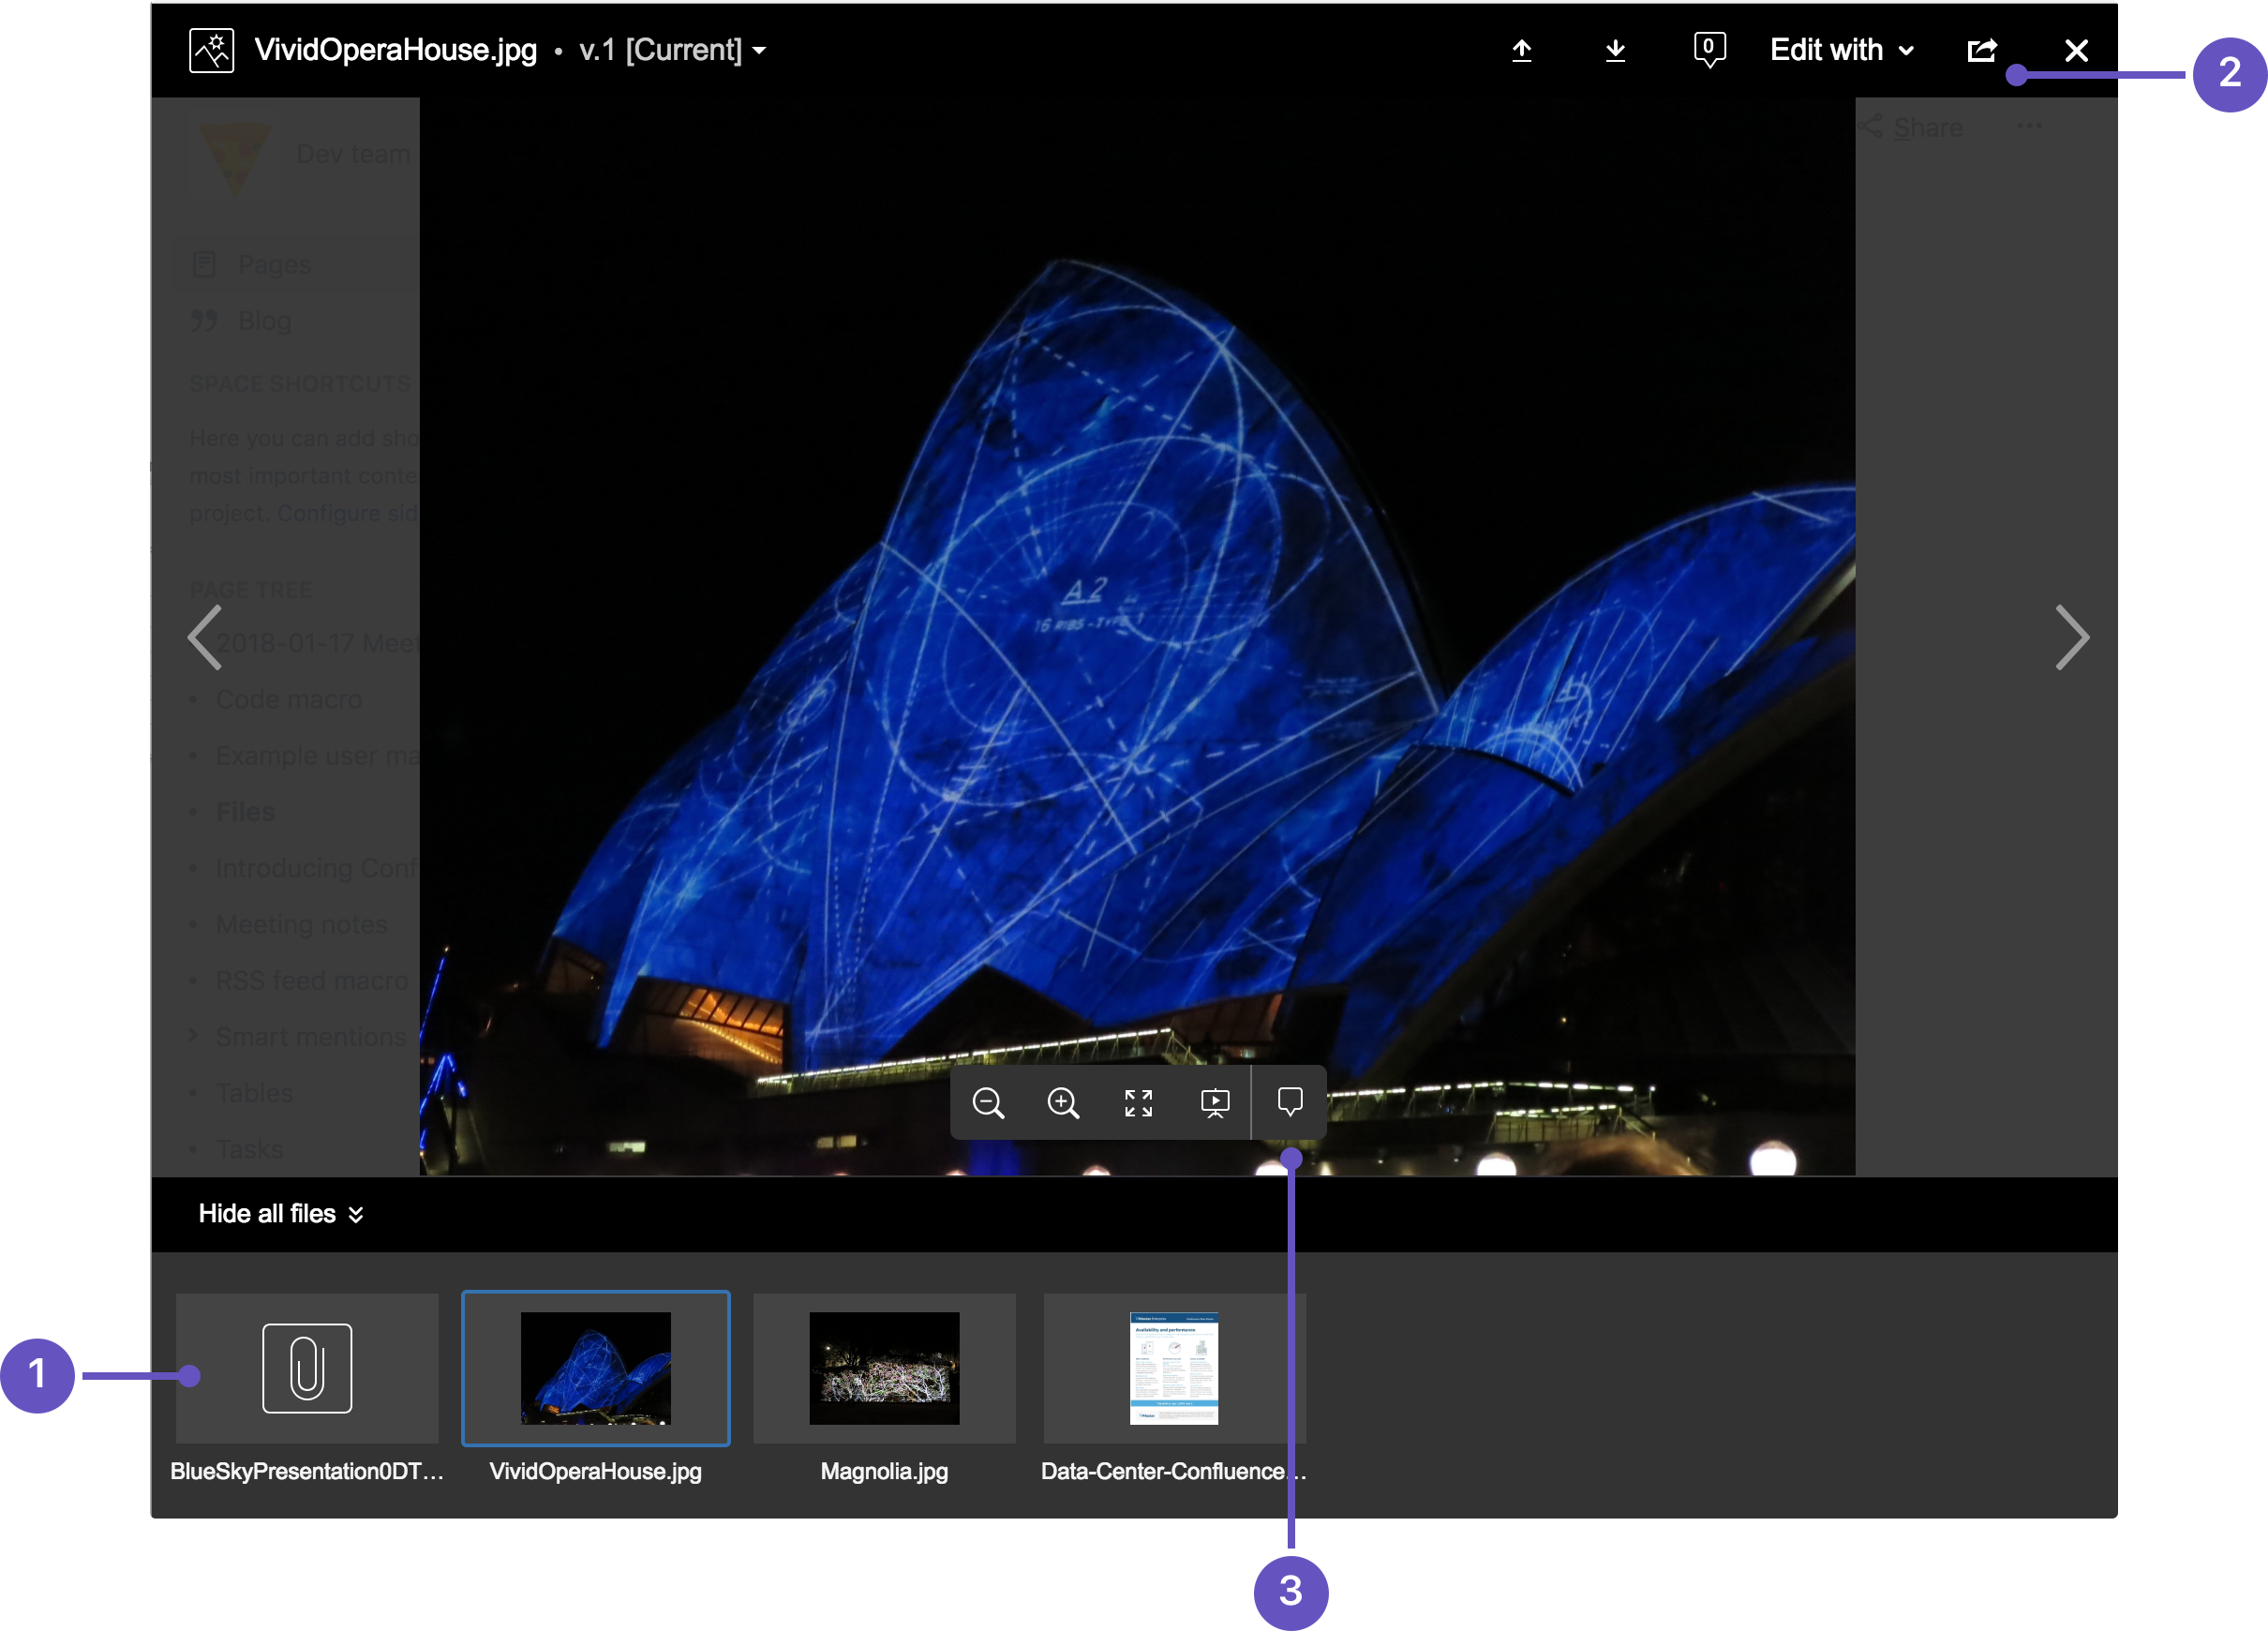
- See more files: see other files also attached to this page.
- Manage this file: download the file, upload a new version or share with your team.
- Add a comment: drag the pin to comment on the file.
Office and PDF files
Inserting a file in a page is a great way to make useful documents, spreadsheets, presentations and other files available to your team.
As with all file types, you can choose to insert the file as a link, or as a thumbnail. The thumbnail shows a preview of the document's contents, and can be resized.
To view an Office or PDF file, click the link or thumbnail to see the full preview (no need to have Excel, Word or PowerPoint installed). Alternatively, use the Download button in the preview to download the file and view offline.
You can even edit and comment on Office and PDF files.
Customize your image file display
When editing the page, select an image to show the image properties panel. The panel allows you to set the display size, add a border, and effects, link the image to other pages, and provide a caption.

From the image properties panel you can:
- enter a width for the image (between 16px and 900px)
- set a preset size for the image
- add a border around the image
- add a link to the image
- add effects to the image such as drop shadow or snapshot (go to Properties > Effects)
- provide alt text used by screen readers and when the image can't be shown (go to Properties > Description)
- give the image a caption by typing it into the caption field (also available in Properties > Description)

- In the editor, image captions are indicated by a label icon
 and grey strip below the image.
 - When viewing a page, image captions are displayed.
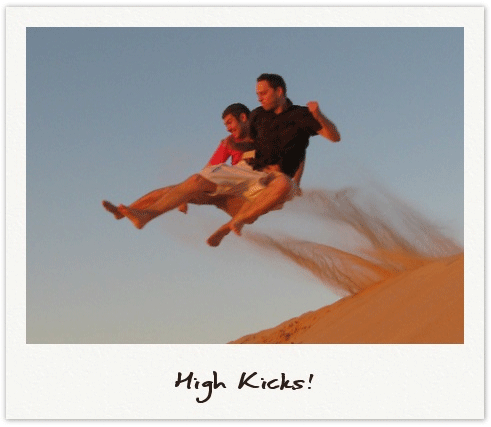
To add a caption to an image using the Instant Camera effect:
- Select Effects in the image properties panel and choose the Instant Camera image effect.
- Save the page.
- Go to More options> Attachments to go to the 'Attachments' view of the page.

- Choose Properties next to the image file.
- Add a comment to the attachment. The text in your comment will appear as the image caption.
You'll need to re-enter the comment each time you upload a new version of the image.
Note: The Instant Camera effect only works with Latin character languages, due to a lack of handwriting style fonts in multi-byte languages.
A note on using Image Effects
Displaying image effects can be resource intensive. Confluence will prevent users from applying an image effect if the image is very large (based on data size and dimensions in pixels).
Confluence also limits the threads that are dedicated to displaying image effects so that it does not impact your whole instance. If a thread is not available, Confluence will display the image without the effect. See Image effects are not displayed in Confluence 5.5 or later if you need to adjust the number of threads.
Resize an image through dragging
You can resize an image by dragging one of the handles that will appear on either side of the image when you select it. This is a more visual alternative to using the options available in the image properties panel.
Click on an image to select it.
Hover your mouse on the right border of the image to display the drag handle (a vertical line)
Hold down your mouse and move it to the left to enlarge your image, or to the right to make it smaller.
The width and height will remain in proportion to each other.Click away from the image to confirm the new size.
Wrap text around an image
You can change the way text appears around an image via the editor toolbar at the top of your screen.
- Select the image.
- Use the left and right align buttons in the editor toolbar to text wrap around the image.
- Double click on the same align button to remove text alignment (this will align the image without text wrap).
- Save your page.
Multimedia files
The file preview also supports MP3 audio and MP4 video files. It uses HTML5 to play attached audio and video files. This means the file types people can play in the preview depends on the audio and video formats their browser supports.
You can also display a wider range of multimedia files (video, audio and animation) using the Multimedia Macro.
Display online video (such as YouTube or Vimeo videos) using the Widget Connector Macro.
Show a list of files on a page
There are several ways you can display a list of files on a page. You can:
- Use the Attachments Macro to show files attached to the current page.
- Use the Space Attachments Macro to show all files in a space.
- Use the Gallery Macro to show thumbnails of images attached to a page.
You can also use the File List blueprint for uploading, viewing and managing lists of files.